Previously, we spoke about how VPN is going to change your life. We also spoke about how it keeps you safe wherever you are. Now, I would like to bring you the good news. VPN is not only for Windows/Mac users, but also Android. Yes, that is right. If you have an Android device, you can easily connect to VPN from your device.
There are plenty of benefits from using VPN. You can freely download any application, even the blocked ones. You can create a secure connection, especially on Wi-Fi and many more. These benefits are waiting for you, but only if you choose the right VPN. This is the reason I recommend you VPN Asia.
Using VPN Asia to Connect to VPN from Your Android Device
VPN Asia helps you do great things. Here are the reasons we recommend this application for you:
- change or mask your IP
- unblock web restrictions
- unblock applications, from Instagram, SnapChat, Youtube, Hulu, Facebook, Skype, Netflix, BBC iPlayer, and many more
- stop ISP’s from logging and throttling your speed.
- keep all your data secure and private.
- browse the internet with the true online freedom – no logging, no throttling and unlimited high quality speed
With more than 24,000 IPs on 130+ servers in 17+ countries, VPN Asia is certainly the best and fastest way to connect to VPN in Asia. So, how do you exactly use this app to connect to VPN from your Android device?
Let me guide you 🙂
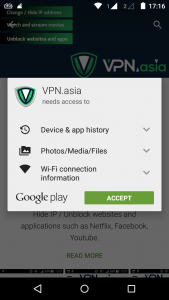
Download VPN Asia from Google Play Store
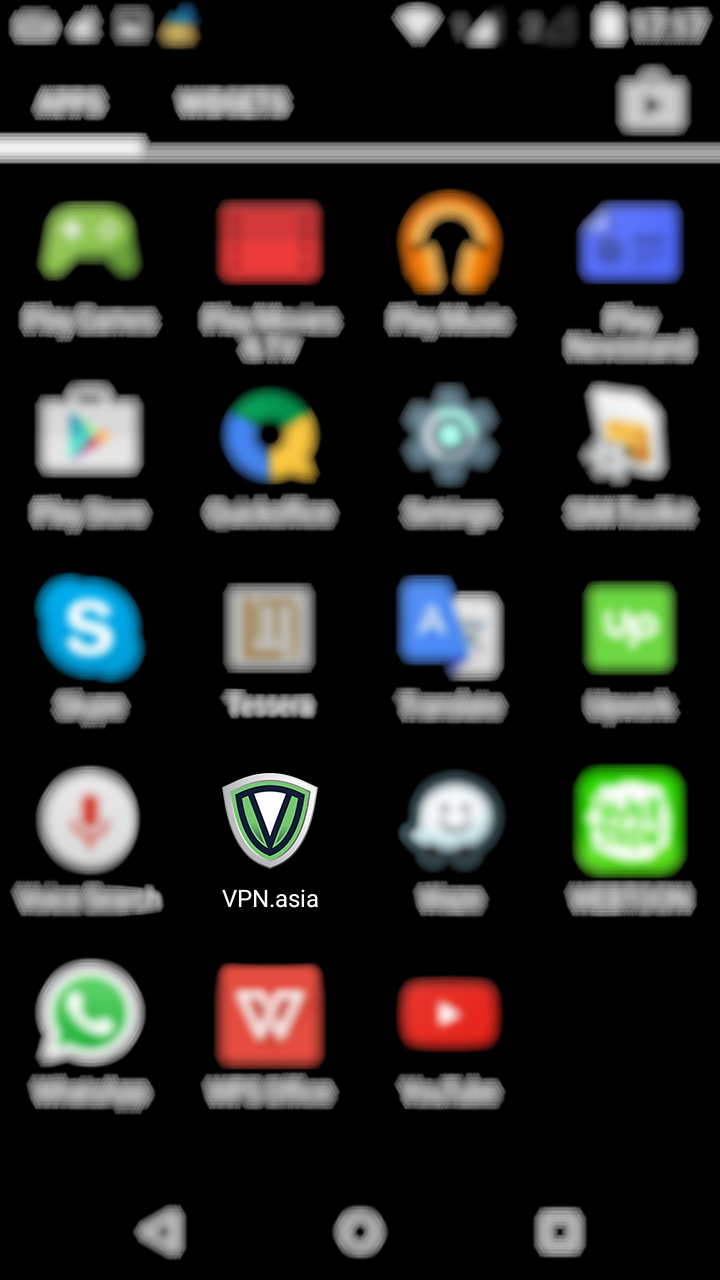
2. Once downloaded, open VPN Asia app from your Apps menu.

Open VPN Asia app from your menu
3. Wait until you see the following display. Then, tap “Sign Up” or “Sign In” if you are a registered member. This time I would register as a new user.
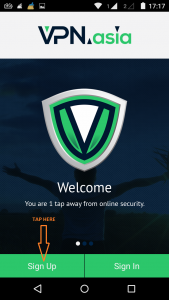
Sign Up or Sign In Before Using VPN Asia
4. Wait until a few seconds until you see the following display. There are various subscription plans for you to choose, based on your budget. If you don’t know which one to pick, you can also chat the support team by tapping the red button at the right lower part of the screen. This time, I would pick the free trial. It allows me to use VPN Asia to connect to VPN. For three days, I can do it for free. After that, I can easily upgrade my plan.

Choose Your Usage Plan
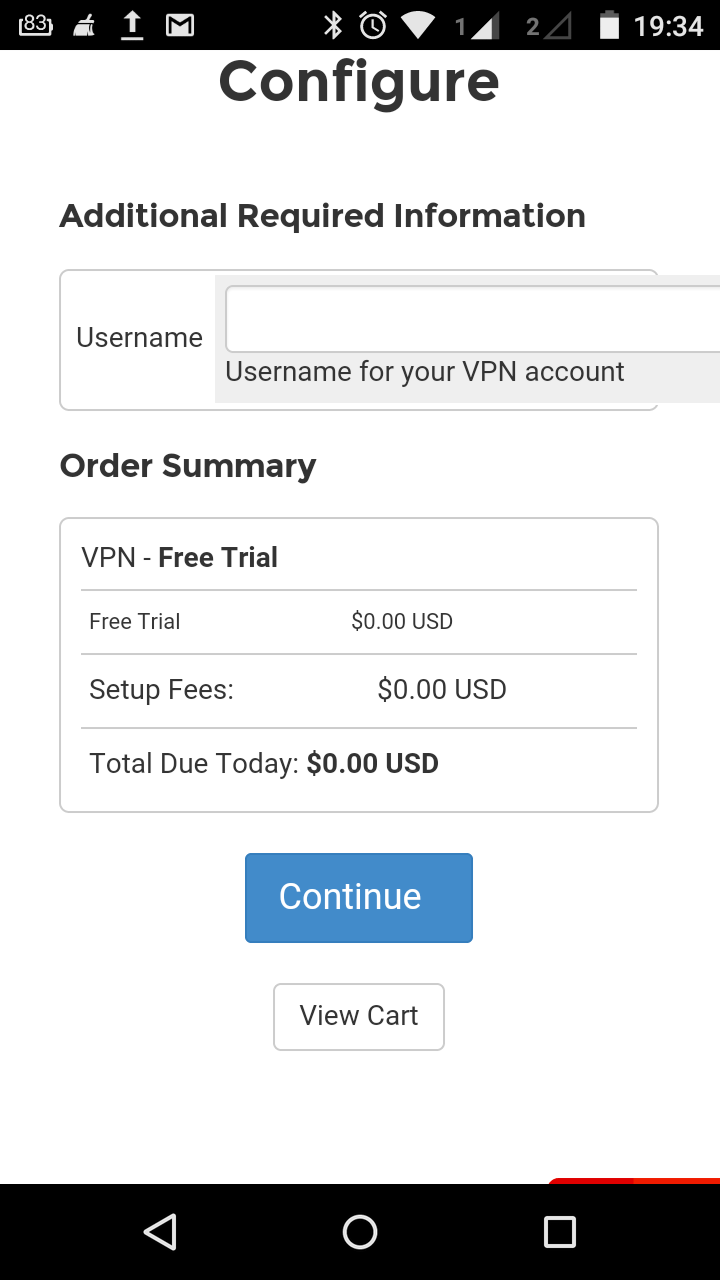
5. Once you chose your usage plan, the application will direct you to the Configuration Page. Please notice that the Configuration Page of each usage plan is different from one another. Please have a look at the following pages. One of them from the Free Trial subscription and another one from the Monthly Full access VPN.

VPN Asia Configuration Page for Free Trial subscription

VPN Asia Configuration Page for Monthly Full Access VPN subscription
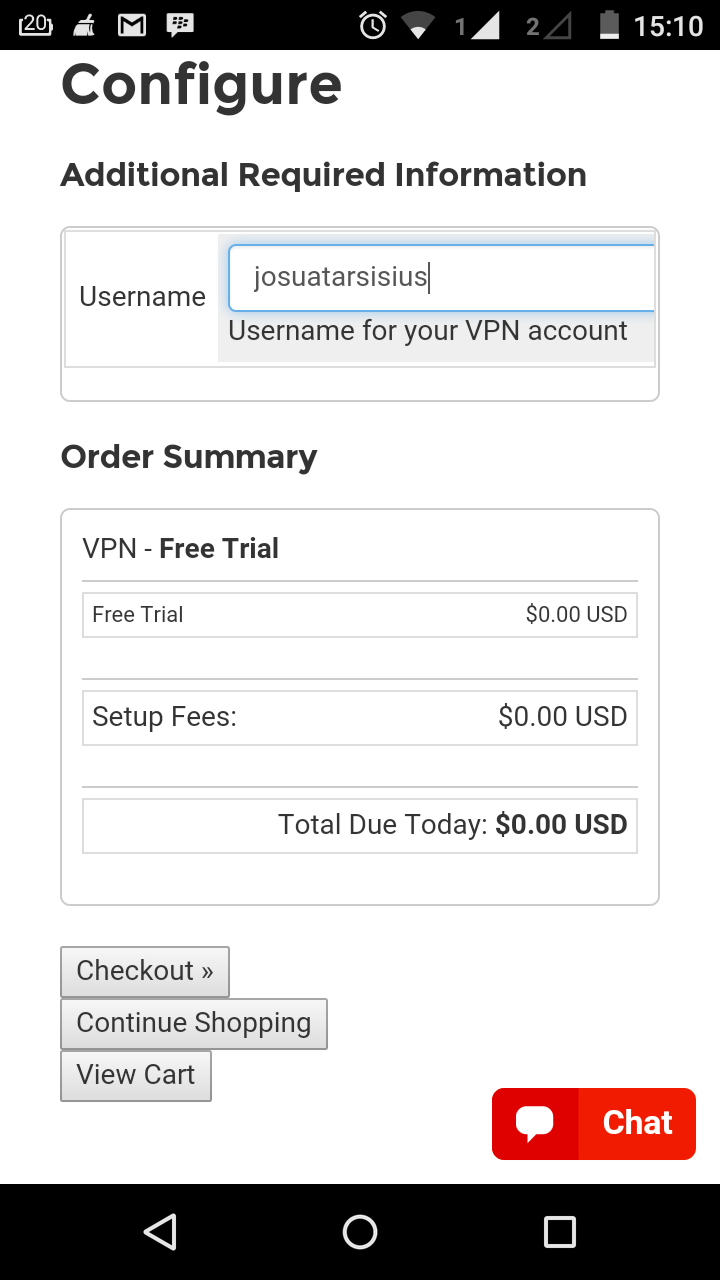
Do not forget to set your username for VPN account at this step. Once you set it, you can tap the “Checkout” button. For example, I set my username as ‘josuatarsisius’

Set your VPN account username
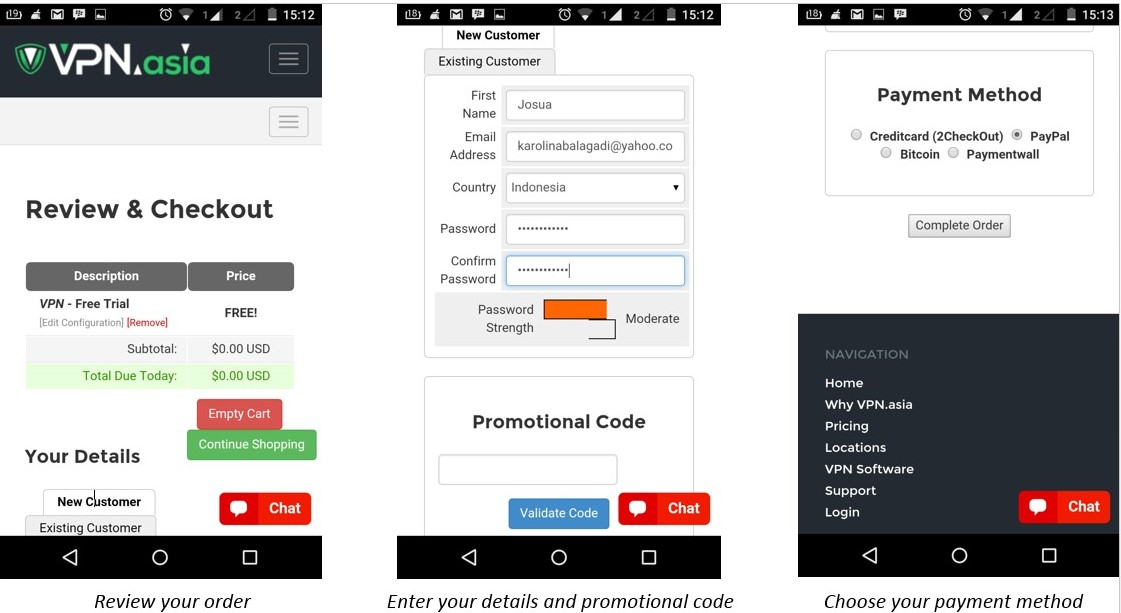
6. Next, review your order, provide your information (including password, first name, email address, and country of origin), and promotional code (if any). At last, choose your payment method from the currently available options (Credit card, PayPal, Bitcoin, and Paymentwall).
Once done, you can click the “Complete Order” button.
7. Wait for a few minutes until you see the following display. Once it appeared, proceed to steps (6) from Web Registration below.
Once this message appeared, check your mail for further instructions
VPN Asia Web Registration
VPN Asia can help you connect to VPN from your browser. Let me show you how to use it.
1. Click
here to visit VPN Asia.
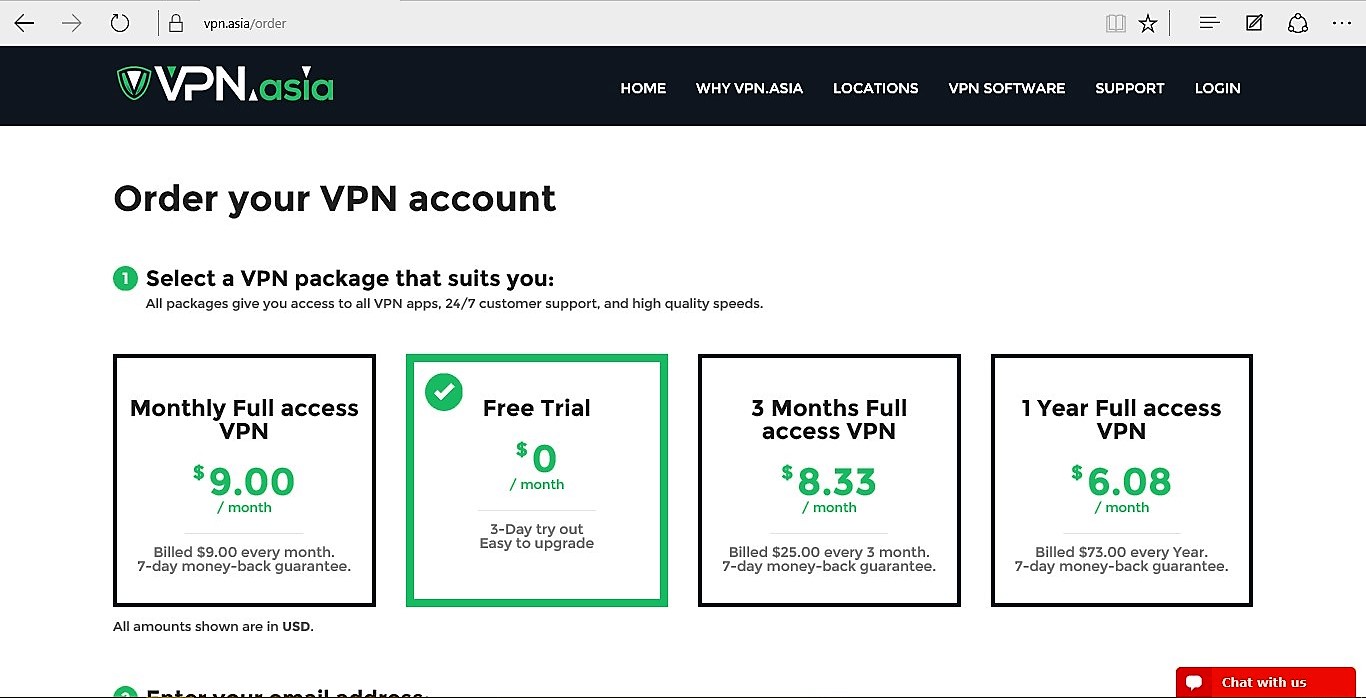
2. The link will direct you to VPN Asia Order Placement. First, you need to choose your subscription plan. For example, I would use the Free Trial scheme.
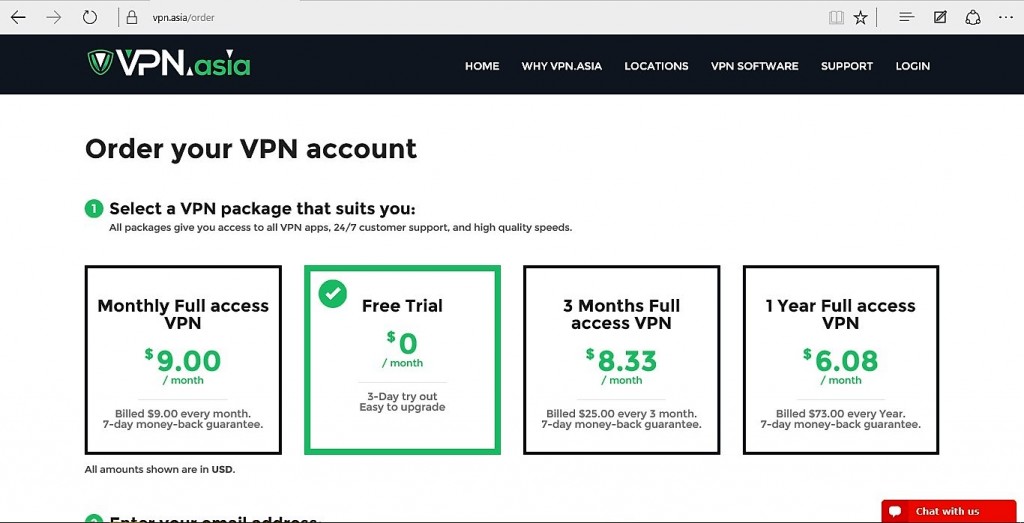
Choose your VPN Asia subscription plan
3. Enter your e-mail address.

Enter your email address
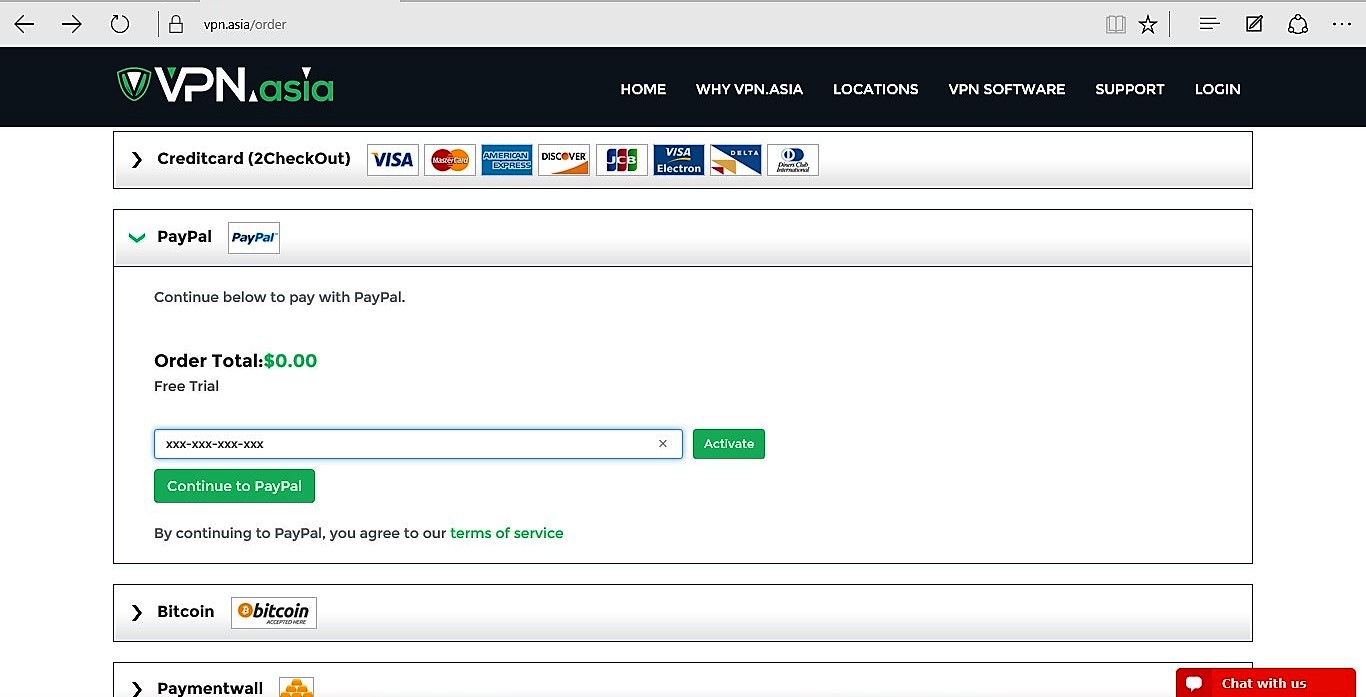
4. Choose your payment method. Currently, we support payment made through credit card (Visa, MasterCard, American Express, Discover, JCB, Visa Electron, Delta, and Diners Club International), PayPal, Bitcoin, and Paymentwall. Once you chose your payment method, we would provide you information on your total order. You can also insert your promotional code here (if any) before proceeding to check out. We also recommend you to read carefully our Terms and Conditions before making the purchase.
Then click “Continue to (your payment method)”
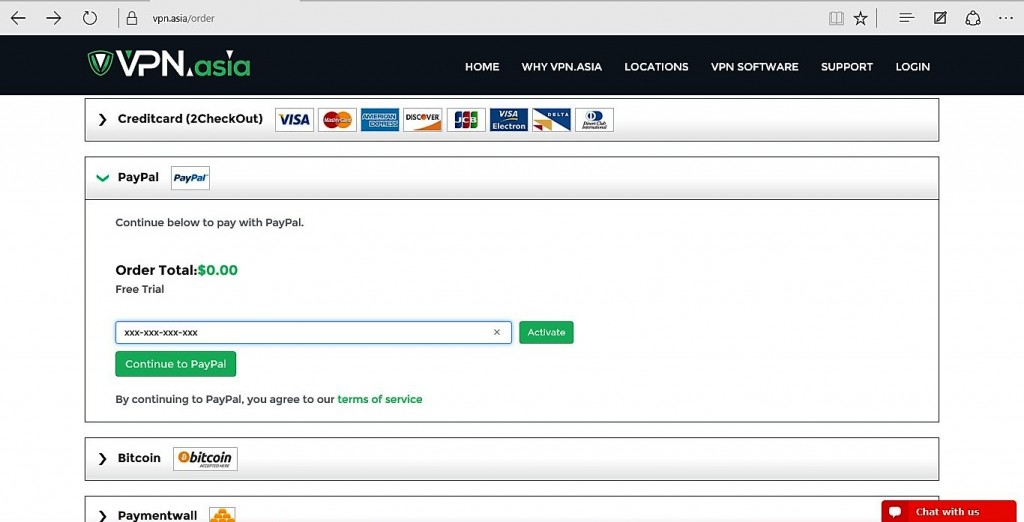
Review your VPN Asia order
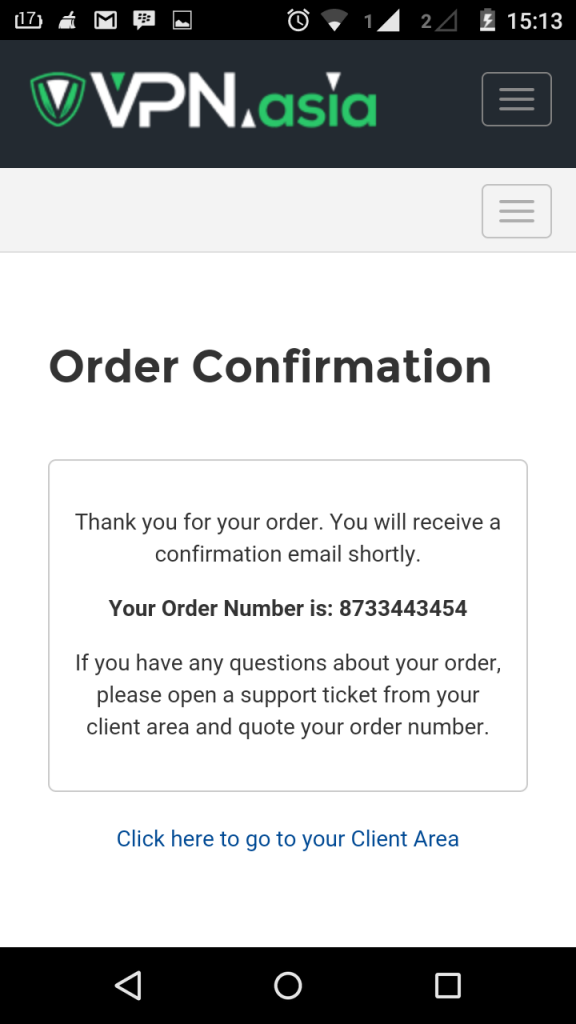
5. Wait for a few seconds until the following display appears.
VPN Asia confirmation page
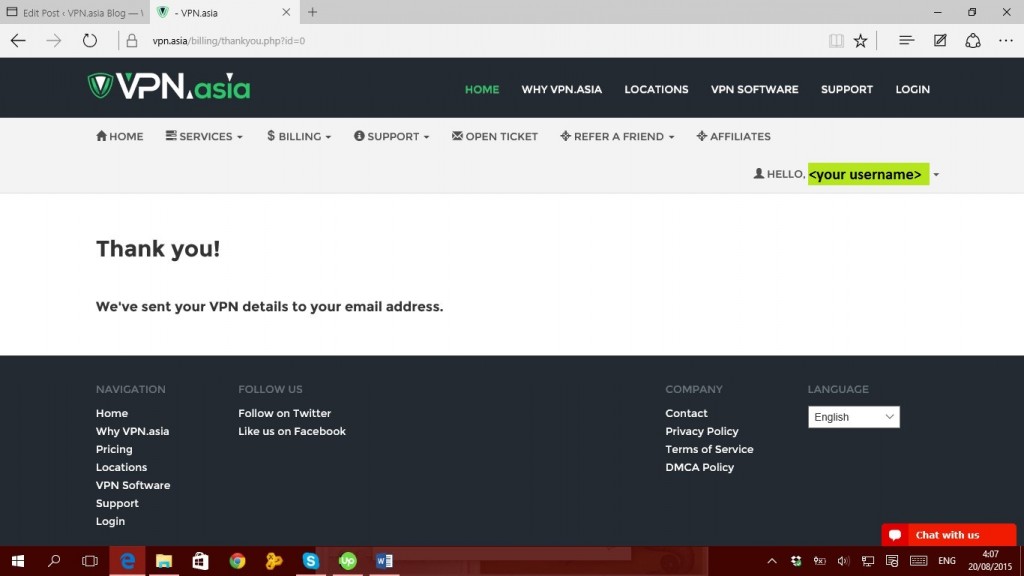
6. Now, please check your mail. Typically, you will get three different emails from VPN Asia before you can connect to VPN. First, you will get order confirmation email as you can see from the image below.
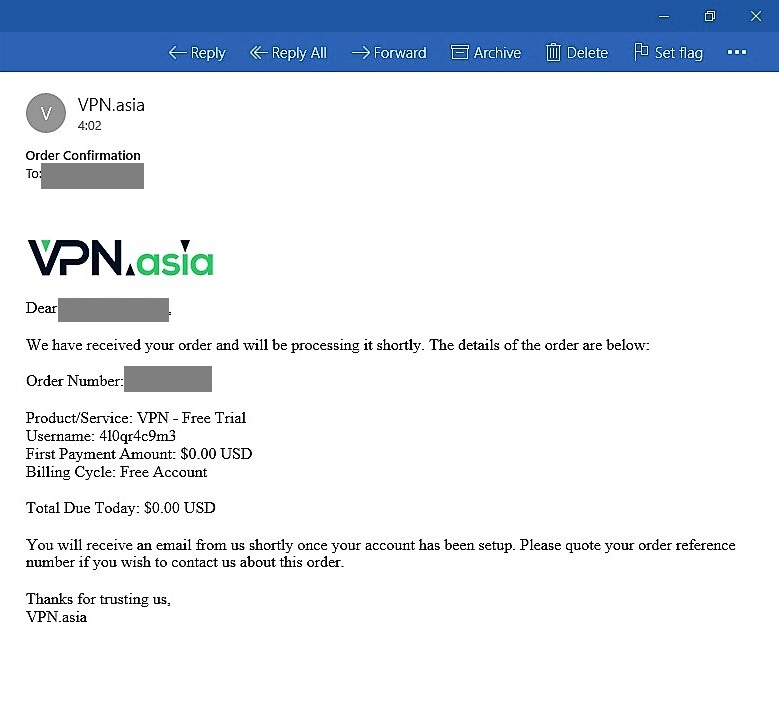
VPN Asia order confirmation email
The second email contains your Subscription Plan review, your VPN Asia account username, and password, as you can see from the image below. These are important details before you can connect to VPN.
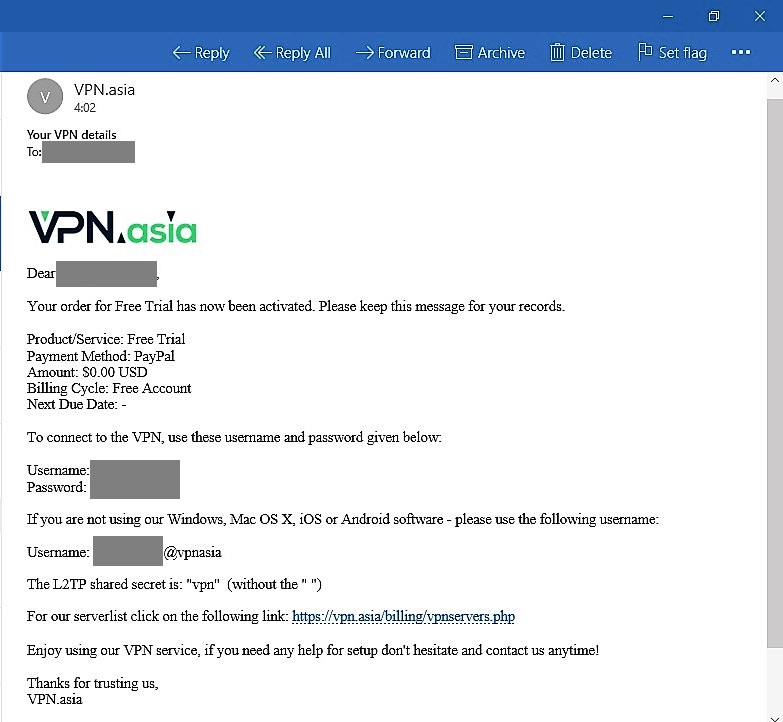
VPN Asia subscription plan and account review
The third email is your final confirmation. Once you received the following email, you are one step closer to connect to VPN.

VPN Asia final confirmation email
Now, let me show you how to connect to VPN using our VPN Asia.
1. Open your “Settings” application, then choose “More” option under “Wireless & Networks.” (if you are running Android 2.3, choose “Wireless & Networks” instead).
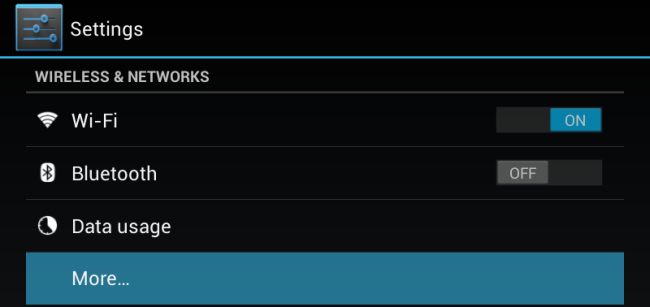
Choose “More” under “Wireless & Networks” menu
2. Choose “VPN” on your display screen. (if you are running Android 2.3, choose “VPN Settings”)
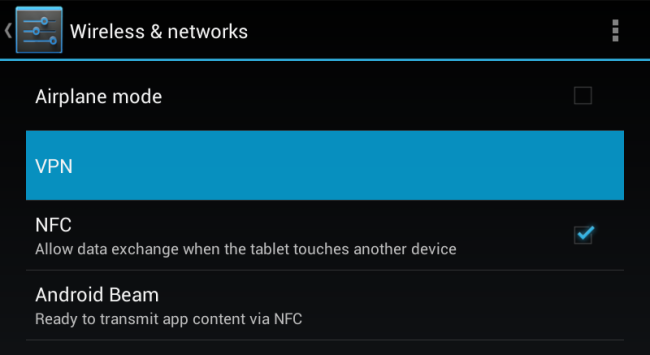
Choose VPN
3. Choose the “+” button and enter our VPN Asia details. You can use a familiar name for the VPN to help you remember in the “Name” field. Next, select the VPN server type you want to use, and enter our server address, either in numerical or URL. Then, tap “Save” to connect to VPN.
Note: you can find all of our available servers here.
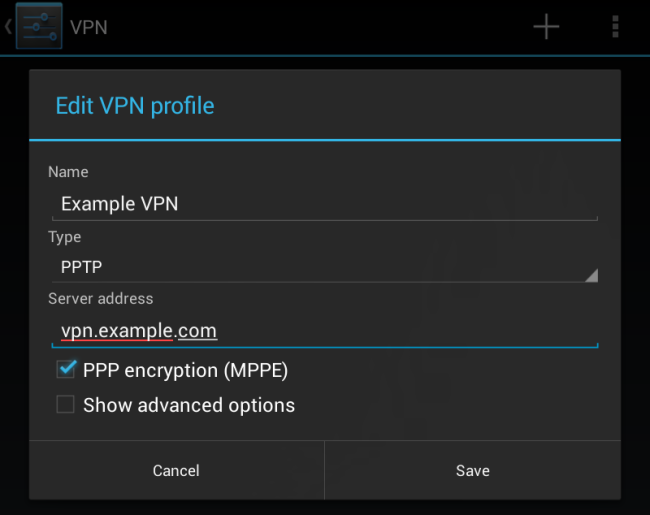
Enter details into the VPN settings
4. Tap the VPN you created to connect to our service. A pop-up display will appear, requesting you to enter your account details. Please provide username and password we gave to you after your registration.
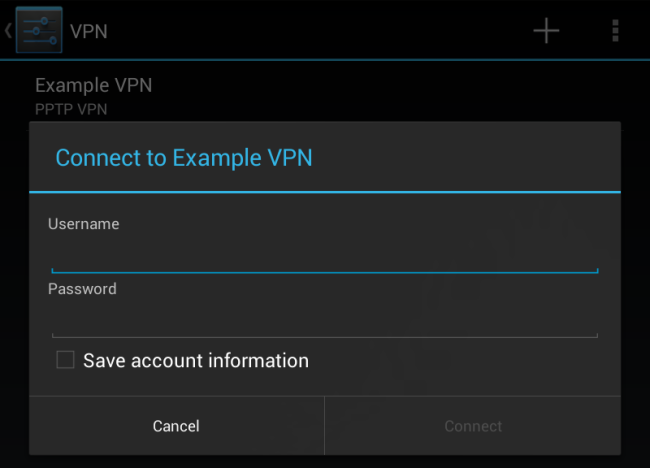
Enter your VPN Asia account details
5. While you are connected to a VPN, you will see a notification in your Android notification drawer: “VPN activated.” you can simply tap this notification and choose “Disconnect” whenever you want to disconnect from the VPN.
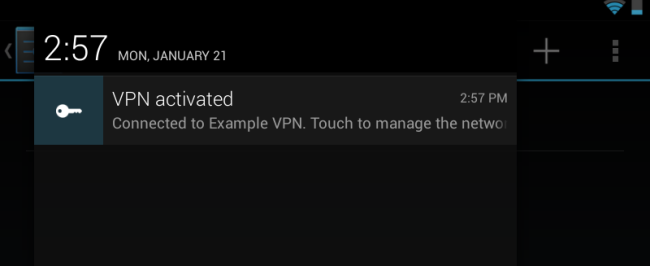
VPN connection notification
That’s it 🙂 Now you can connect to VPN without hesitation 🙂
 English
 German
 Dutch
Dutch Thai
Thai Chinese